1.23.2010

Gifting the Wedding Party

I have mentioned gifts for our wedding party before, but I can actually share them with you now.

For the ladies (and man):
A tote bag made by my grandmother out of fabric I found at the swap meet for $3.


Personalized name tags with our love birds logo

Luggage tags from Forever 21

Chocolate brown cashmere pahminas from Ebay

Packaged nice and pretty


Red flip flops (that no one really ended up wearing)

They also got manicure sets and the bridal party survival kits that I previously blogged about. Bridesman Tony got a gift card to In N Out instead of a pashmina.

For the guys:


Cigars are a West Point tradition. I ordered engraved cigar cutters for them.

Add a cigar, some ribbon, and a personal note from the groom.

The parents received framed 5x7 pictures of us.

Thank you for being a part of our special day, everyone. We love you!

1.20.2010

Two Weddings

Dear Guests,

The ceremony you watched on December 27th was a fraud. We apologize for tricking you all. The truth is we actually officially got married on the 22nd in a civil ceremony at the Norwalk branch office. We only did it out of necessity because our officiant had no legal power to marry us.

Since I can't seem to post any videos from what we consider to be our "real" wedding, here is a video of the civil ceremony.

We really tried hard to downsize the importance of the civil ceremony simply because we didn't want to spoil our wedding day. It wasn't really that difficult to do either when there were protesters outside the office, crying babies, and long lines.

Even so, you can tell that we were still giddy with excitement.

And if you see pictures of our December 27th ceremony, you will see that emotions were still running high despite the fact that we were technically already hitched.

Plus, I didn't have to worry about cold feet on Sunday since it was already too late to back out...all a part of the grand scheme.

Thank you for understanding.

Love,

Min and Brandon

1.08.2010

My Bridezilla Organization

When it came to packing all the boxes of wedding items up, I admit that I went a little wild. I am the type of person who has to do everything on her own, and I knew that it would not be possible on my wedding day.

In an attempt to have things perfect, I wrote/drew things in detail. It seems like a completely Minzilla thing to do, but it ended up being incredibly useful because no one knew what was going on.

Each box was labeled with our names and a list of the items inside. I purposely organized everything so that similar items went together. Things on the seating card table were all in one box. All the candles went in another, and so on. I also pasted detailed instructions for people to use because I did not want people coming to me and asking where things belonged. For example:

Glass apothecary jar w/ pink roses
◦ To be used for holding wish cards. Make sure the “wishes” sign is hung over the handle. Place on guest book table in hallway next to brown basket w/ wish cards and gold and silver pens. Throw in three blank wish cards in as an example for guests to follow.


But I didn't stop with just words. After all, there are many visual people. I also drew diagrams!

And I also labeled some of the items inside the box with post-its.
People thought that I was crazy for doing all of this, but I think it was worth it in the end. I was able to go into the reception room and the hallways and see everything placed exactly where I wanted.

1.02.2010

Minzilla is Back!

My sincere apologies for not posting updates earlier. I'm sure you can understand. I have been busy getting married and going on our honeymoon, after all.

Yes, Minzilla finally got hitched!

I really do not know where to begin with the wedding recaps. There are so many good wedding pictures thanks to Facebook and digital cameras, and I have not even seen the professional shots yet. Expect a lot of pictures later on because I just want to show our wonderful day to the entire world.

Here is just a teaser from our seriously kick-ass photographer, Hannah Suh.


I am going to take some time to organize my recaps and will probably wait until I get the professional photos because I want to get it right the first time. This means that you will have to wait weeks before you see everything in all its perfectly lit and placed glory.

But don't worry, I won't leave you completely hanging. I still have some more DIY stuff that I haven't covered.

Can I just first tell you that the wedding was truly amazing? I could not stop smiling...except when Brandon had us all crying like babies, but more on that later.

See you soon!

12.11.2009

DIY Bouquets

My hopes of having a peony bouquet died when I received my fake flowers in the mail from Afloral.com. The entire shipment was a disappointment and I had to start all over again.


Everything was too sparse and unacceptable for a bridal bouquet. They actually look better in the pictures than in person. It would have worked fine if I ordered another bouquet of peonies, but they ran out. What are the chances, right?

My sister and I hunted for better fake flowers at Michael's and found white hydrangea stems ($4.60 each after coupon) that were a good size for the bridesmaids. They needed a little bit of color so we grabbed a few light purple flowers ($1.09 each bunch).
I got the glass vases from Dollar Tree, by the way.

For my bouquet, we used two stems to make it fuller and added red accents.


The bottom of the stems were first padded with napkins to make the handles thicker and easier to hold. They were then wrapped tediously with brown satin ribbon. I also sewed on the monogram charms that I shared with you before.


Cost of bouquets if I had purchased them from the florist: $330
Cost of flowers from Afloral.com (which I'm going to return): $50.30

Comparison of Afloral vs. Michael's flowers

Final cost of flowers from Michael's: $32.95
Amount saved: $297.05

12.07.2009

With This Ring

Brandon is going to be marrying a cheapo wife. I didn't want to invest in a lot of money for his wedding band because of the nature of his job. He crawls in mud, climbs ropes, does pull ups and push ups, carries ruffles and other hooah stuff.

In comes titanium rings, which are lightweight, durable, hypoallergenc, affordable and comfortable. I ordered his from Etsy seller titaniumknights for $45. They made it and shipped it within five days.

Brandon asked for something classically simple and thin.
My rings came out for another photo shoot, too. I placed them on one of the bridesmaid's bouquets. My Christmas gift three years ago was a promise ring with round diamonds on the band. It will serve as the ring Brandon places on my finger at the altar. The ring has too much sentimental value for me to stick in a box somewhere.
Let's hope everything fits when Brandon gets home on the 18th.

12.04.2009

DIY Failure and DIY Success Stories


I had marvelous plans for making sugar cookies decorated with royal icing as thank you gifts for attendees of my bridal shower.

In my mind, I had imagined them to look like the picture on the left, but, instead, they were a bit of a tasty disaster.

I spent about four hours making the cookies and was not at all pleased with my results.


Here are my reasons why I think I failed:
  1. I do not own a rolling pin, so instead I used a can wrapped in saran wrap.
  2. I do not own a sifter or a measuring scoop, resulting in my royal icing being a clumping mess.
  3. I had never worked with actual tips and piping bags before.
  4. There was no room in my fridge to cool my cookie dough so my cookies did not retain their form very well.

I will perfect you one day, Royal Icing. You just wait and see!

But at least my little tags came out adorable! Flower art found from here.
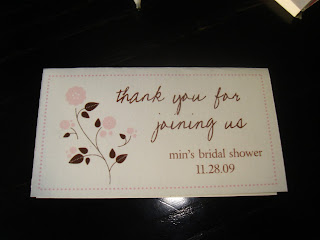
I couldn't let my guests go home without sweets, so I made brownie balls dipped in chocolate instead. I forgot to take a picture of them, but they look similar to the ones on the right, except I drizzled with pink icing so that they would match my tags.

Use this recipe if you want to make them yourself (makes 48):

Ingredients: 13x9 cooled brownie sheet, half a can of chocolate frosting, one bag of chocolate chips, icing (or caramel) for drizzling

Procedure: Crumble brownies into a large bowl. Eat the yummy crispy edges because they won't crumble finely enough. Mix in half a can of frosting. Roll mixture into 1-inch balls and place onto wax paper. Melt chocolate chips over a double broiler. Dip the brownie balls into the chocolate to coat completely. Place coated balls onto wax paper. Refrigerate until completely cool.

The following project when much more smoothly and was pain absolutely pain free. I am going to have water and snacks available for the bridesmaids(man) and groomsmen when they get to the Nixon Library the day of the wedding.
I made personalized water bottle labels by using this template and this bird image.
Materials: water bottles, paper, ruler, razor, tape roller
Cost: $2.50 for 12 bottles of water at Target
Procedure:
1. Design your labels using PowerPoint and print onto regular printer paper. You can print them on waterproof paper, but it is unnecessary unless you are going to chill them in ice.
2. Cut labels using razor and ruler to get straight lines.
3. Remove original label.
4. Put adhesive on one end of the label.
5. Wrap and secure onto bottle.


Brandon and I went on a candle shopping spree at Ikea the last time he was home. We left with a lot of goodies, including red candle holders that were on clearance for 29 cents compared to 99 cents a piece.

I put them all in a box and moved them from one corner of my room to another and cringed when I heard these red beauties clanking together. My solution for this involved digging in a trash can next to the pear station in the grocery store.
The same packaging used to prevent bruising on pears can be used to protect glass objects from breaking.

Cost: $0

Dumpster diving for your wedding? That's dedication there, yo!