


Here are my reasons why I think I failed:
- I do not own a rolling pin, so instead I used a can wrapped in saran wrap.
- I do not own a sifter or a measuring scoop, resulting in my royal icing being a clumping mess.
- I had never worked with actual tips and piping bags before.
- There was no room in my fridge to cool my cookie dough so my cookies did not retain their form very well.
I will perfect you one day, Royal Icing. You just wait and see!
But at least my little tags came out adorable! Flower art found from here. 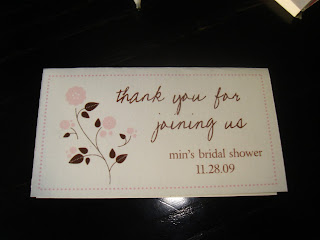


I couldn't let my guests go home without sweets, so I made brownie balls dipped in chocolate instead. I forgot to take a picture of them, but they look similar to the ones on the right, except I drizzled with pink icing so that they would match my tags.
Use this recipe if you want to make them yourself (makes 48):
Ingredients: 13x9 cooled brownie sheet, half a can of chocolate frosting, one bag of chocolate chips, icing (or caramel) for drizzling
Procedure: Crumble brownies into a large bowl. Eat the yummy crispy edges because they won't crumble finely enough. Mix in half a can of frosting. Roll mixture into 1-inch balls and place onto wax paper. Melt chocolate chips over a double broiler. Dip the brownie balls into the chocolate to coat completely. Place coated balls onto wax paper. Refrigerate until completely cool.
 Procedure:
1. Design your labels using PowerPoint and print onto regular printer paper. You can print them on waterproof paper, but it is unnecessary unless you are going to chill them in ice.
 2. Cut labels using razor and ruler to get straight lines.
  5. Wrap and secure onto bottle.
Brandon and I went on a candle shopping spree at Ikea the last time he was home. We left with a lot of goodies, including red candle holders that were on clearance for 29 cents compared to 99 cents a piece.
 I put them all in a box and moved them from one corner of my room to another and cringed when I heard these red beauties clanking together. My solution for this involved digging in a trash can next to the pear station in the grocery store.
Dumpster diving for your wedding? That's dedication there, yo!


i love you
ReplyDelete-your hubby