Showing posts with label invitation. Show all posts

11.07.2009

Invitation Suite: The Breakdown


Here is the breakdown of the costs for our invitations:

Envelopes:
70 envelopes from Paper Source: $22.63
Wraparound labels: $3.63
Stamps: $18.91
Liner: $10.00
Glue stick: $1.79
Total: $56.96

Belly Band:
Card stock from Big Lots: $1.00
Ribbon: $0.69
Doily edge punch $14.99
Tape runner: $1.00
Total: $17.68
Invitations:
RSVP stamp: $8.25
Paper when calculated by per piece: $6.30
Total: $14.55

Total cost: $89.19
Total invites: 55

Cost per invite: $1.62
Compare to this invitation from Wedding Paper Divas that costs $185.90 for just plain white envelopes, the invitation cards, and response cards alone.
Take that, ridiculously expensive wedding industry!

11.04.2009

Invitation Suite: The Little Details

All of the little details put together is what makes our invitation work. These things might be overlooked by others, but they are things that I would notice if I saw them myself.
Traditional and more formal invitations house all of the contents with an inner envelope and maybe some tissue paper to prevent smearing. I decided to use a belly band to hold it all together instead. I made these using heavy cardstock (a pack for $1), a Martha Stewart doily edge punch ($7.50 after coupon), chocolate brown ribbon ($0.69 for a roll), and a tape runner ($1). Unfortunately, the edge punch broke less than halfway through so some people received straight edged belly bands
Guests are supposed to mail back both the RSVP card and a comment card in a pre-addressed envelope by December 1st so that I can have an accurate guest count for the caterer.
I intenionally created the RSVP card to be in a similar format as the save the date by stamping the letters "RSVP" in gold ink. I made sure to note how many seats were saved for each guest in order to limit numbers.There was no room to ask about entree choices or to give more information so I made a separate card. On it, I asked guests to give us songs they like to dance to and asked if they have any dietary concerns we should know about in order to "make the night as merry as possible."

I also gave guests the option to save a stamp and RSVP through our website our through my email account.

I also wrote a reference code on the back of each card in case guests forgot to write their names so that I could still identify them. The code "B8" means the eighth guest on the bride's list.

Invitation Suite: The Big Reveal

The invitations made it safely to their destinations and guests are already beginning to RSVP through our website, meaning I can finally show them to my readers.
I turned this red peony set from Target into our beautiful invitations. They were on clearance from $34.99 per box to only $6.70. I bought three boxes right away. Have I mentioned how much I love Target?

The contents of the 50 invitation kit were already fantastic alone, but just needed a little customization.


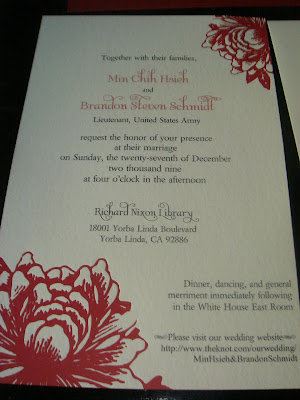
Since I had enough invitation sets to make 150 invitations when I only needed to make about 55, I was able to make mistakes and use sheets for multiple parts of the invite. For example, the cards meant for the RSVPs were also used for our save the dates. The extra sheets for the actual invitations were cut in half and used for the comment card.

Here was the result. I used the same fonts we used for all the stationary projects to maintain some uniformity. The envelope for the RSVP cards were embossed with a peony stamp.


Here is the actual invitation close up. Brandon's input in this was the "general merriment immediately following" part. I also included the address for our wedding website so that guests can have access to directions to the Nixon Library, our registries, RSVP, learn more about us and sign our online guest book.

Can you now see why I have been so proud of myself?

10.31.2009

Invitation Suite: The Envelopes

Brandon and I finally mailed out the invitations yesterday so check your mail boxes frequently.

We were able to get the postman to hand cancel the stamps in order to keep the envelopes as close to its original condition as possible when they arrive.

He was really understanding about it, but then he just threw them in a box and it made my heart sink.

I hope that our guests handle them with a lot of TLC.

This is what you will find in your mail. We bought these nice red envelopes at Paper Source ($3.00 for 10 envelopes). The envelopes from the invite kit felt cheap.

Instead of having someone hand address the envelopes, I made a template of envelope wraps on Word and printed them on full-size label sheets. I cut them and trimmed the edge with my doily edge punch. This site has a lot of pretty templates that you can download.

Here is the inside of the envelopes. While they are pretty on their own, I wanted to line them with colored paper. I followed templates similar to this one by Martha.
Materials: envelopes, scissors, ruler, pencil, adhesive, heavy paper to make your template on, paper you want to line with. We chose a solid chocolate colored roll wrap from Paper Source ($10 for two rolls)
Step 1: Make a template by first tracing the envelope with its flap open on the heavy paper. Subtract 1/4 inch from each side and cut.
Step 2 (shown above): Trace your template on the liner paper and cut. Slip this into the envelope. Make a fold where the flap folds.

Step 3: Spread adhesive to just the flap. It is not necessary to add any adhesive anywhere else. Debbie figured out that it is best to use old magazine pages under the flap so that you can glue all the way to the edge and protect the envelope.

Step 4: Rub the flap down and make sure it sticks.
Please be careful when you open the envelope as you may accidently peel the liner away from the envelope itself.
And a big shout out to all of my readers out there. It turns out that this blog is more popular than I had thought.

10.19.2009

You've Got Mail

Well, almost. I've been done with the actual invitations since July, but I had to wait to compile all the addresses and to label the envelopes. It's still a tad early to send these babies out. A tad equals one week in this case.
I have slaved over these 55 invitations over the span of the past six months. So when you see these Stardream Red beauties in the mailbox I expect you to jump and scream in delight. Seriously.

(Invitations for both Bush and Obama as we aren't allowed to show political bias in the Army, hooah?)
And here I am teasing you with this low-quality picture. Trust me, they look better in person. And if you don't think so, then lie to me. Flat out lie.
Is it possible to be in love with paper?

4.10.2009

Save This Date!

I told you that I had finished our STD cards, and since they are trickling into mailboxes all across Southern California and New York, I can finally reveal them to you. I must say that I am quite proud of this spectacular DIY accomplishment. A special thank you to Debbie, my MOH, who was willing to hand feed every card into our lousy printer in order to get the best results.

My first step was making STD stickers. I knew that I could not afford getting magnets made, so I figured that stickers were a more budget-friendly alternative. This way, guests can just take the sticker and place it directly on their calendars. For this project, I used:

-Love Birds stamp from Michael's ($1)
-Avery 8.5"x11" full sheet labels ($12.98)
-Chianti ink pad ($2.49)
-Leftover cardstock ($0)
-Glitter fabric paint from my grandmother's stash ($0)

I know that it seems costly, but I plan on using my round punch and full sheet labels for other wedding projects. Total cost for the project if I break it down to each label sheet I used and the stamp: $4.89

I made a template on Microsoft Word and then printed it out onto a full label sheet. I then punched them out and stamped them. I learned that I definitely have trouble centering things and I was too rushed. I even cut slits on all of the backings of the stickers for easing peeling. I also added some glitter to the hearts on the images. I made another template that said, "Mark your calendars. Just peel and stick." I printed this out onto some card stock and attached each sticker using double sided tape. I hope people realize that it is a sticker and make good use out of it.

A few days later, I finally tackled the actual STD card. As I mentioned before, I had purchased three boxes of Target invitation kits for a total of $20.10. I decided that I would print our STD cards on what will also be our RSVP cards since we had so many at our disposal. Easy enough, right? WRONG.

Debbie and I sat down in front of the computer and played around with numerous templates, fonts, colors, wording, and spacing. When we finally agreed upon the appearance of the card, we were faced with problems with our printer.

We had numerous mishaps where words would print out completely blurred and/or crooked. Some words were left out all together. Our printer also decided to eat a couple of pages or sometimes not pick anything up at all. It was a collaborative effort, but we managed to figure out the source of the problems and adjust accordingly.

The project turned into an assembly line. Debbie was in charge of making sure that everything printed out smoothly. I was to hand stamp each card with my "Save This Date" stamp from Michael's ($4.79) with gold ink ($3.59). In the end, we accumulated about twelve unusable cards. Not shabby for two girls using a temperamental printer and a stamp that was produced crooked.

These cards along with the stickers were enclosed in the envelopes that I had hand embossed earlier.

I volunteered Debbie to address the envelopes because her handwriting is much classier than my own.

Here is the final set that was mailed out to our guests:

Breakdown of costs if I do not include the cost of supplies I will use for later projects:

$4.89 for stickers + $4.79 for STD stamp + $6.7 for card stock and envelopes ($20.10/600 pieces x 100) + $17.30 for postage ($0.42 x 40 envelopes + $0.92 for special postage to France)=$32.14

Cost of each STD= $0.30 when not including postage

I've heard numerous positive comments about our STDs so now I am even more anxious to make our invitations. If Brandon lets me, I think I will print out our invitations on our own printer instead of sending it out to a professional for $60+.

I learned something about myself. I don't think I'm a Minzilla after all! I was not bothered by all of the flaws that I saw in the STDs and sent them out anyway. Debbie was incredibly worried that I was not as critical as she thought I should be. Perhaps my anal-retentiveness ways of the past have faded. Life has suddenly become easier.

I think the next post will be a guest post by Debbie on the hunt for the perfect bridesmaid dress...if there is such a thing.

3.24.2009

My first DIY project

I felt bad for not doing anything wedding related in a long time so I sat down and went to work when I had some free time last night and this morning. I completed 120 envelopes within two hours.

I embossed pretty flower stamps from Paper Source that resembled the peonies on our invitations onto plain white envelopes. These envelopes will be used to hold our STD cards and the RSVP cards we want our guests to send back.

Heat embossing is a technique used to raise patterns on paper, giving it texture and detail. It is an easy three-step process, and produces great results that can look almost professional if you do it right.

Here are the materials required for this easy project:

-Envelopes ($0.03 each)
-Rubber stamp ($7.50)
-A pigment ink pad ($3.59) . Other types of ink dry too quickly, and do not hold embossing powder as well. I used Chianti from ColorBox, a deep red that matches well with our colors.
-Clear embossing powder ($1.49)
-A heat gun ($14.99)
-Scratch paper to put underneath for easy cleanup ($0)

The heat gun is the priciest of the materials, but I think that it was a good investment. I purchased everything but the stamp with a 40% off coupon from Michaels.

The first step is to get a lot of ink onto your stamp and press it onto your envelope. Apply even pressure. Do not wiggle it back and forth. Lift the stamp up neatly and carefully.


Next, quickly pour a generous amount of embossing powder directly onto the inked image, making sure that it is entirely covered. Gently shake off excess powder. You can use the remaining powder for your other images. There is no wasting allowed when you're on a budget!

The flowers on the right in the picture have the powder on the ink and is a lighter color. The flowers on the left have been set with the heat gun and are nicely raised and defined.

The last step is to heat the image. Be sure not to hold the heat gun too close to the paper or else it will burn and discolor the paper. The powder will turn into a shiny liquid and will rise. Sit back, and admire your accomplishment.

Here are my final results:

Bella watched the fun happen and even licked a few envelopes

Sorry for the low quality photos, but you can see it better in person when they arrive in your mailbox.

My next project will be the actual STD. I have lots of plans running through my mind and I'm excited to see the end results.

2.23.2009

Min and Brandon request the honour of your presence

Finalizing a guest list is tricky business. We wish we could invite everyone and their moms to share this special day with us, but that would just be impossible.

Each guest just means that we would have to dish out an extra $50-$100 per person. It's an extra plate of food, slice of cake, thank you gift, beverage, invitation, program, etc.

Our guest list has expanded from about 70 to 90 people, despite the fact that we cut down on allowing certain people to have a "plus one". We decided that although the polite thing to do would be to address all of our invitations to "Ms/Mr. X and Guest", it would be too costly to allow people to bring strangers into our wedding. Most of those who are invited have at the very least two other friends to keep them company at the ceremony and reception. Only those who we feel may be a little left out will be allowed to bring a date. We hope that everyone will understand and resist the urge to call me and ask to invite someone else. If I receive such phone calls, I will have to refer them to Groomzilla because he is the only one willing to put his foot down.


Yes, I have dubbed my handsome fiance a Groomzilla. He is very particular about what he likes and doesn't like, which makes my job easier since I cannot make a decision if my life depended on it. Since he is the one paying for the majority of the wedding, he has every right to say when enough is enough...to a certain point, anyway. After all, I wouldn't be a true Minzilla if I allowed him to get everything his way.

Brandon has an exceptionally large family, and they have treated me as one of their own for the past four and a half years. I hate that I cannot send out invitations to each and every one of them, but that is the reality we must face. I don't want to step on any toes before I even offically join his family.

The list of family on my side is sparse, but it has been filled with people my mom would like me to invite, despite the fact that they have no significance to me personally. Even so, we don't really expect all of them to show up. It's more of a courtesy invite than anything else. But that's tricky too. We don't actually know if they are going to show up or not. If they do, then we will have more people than we want there.

How do you know who you should and shouldn't invite? If you invite this person's brother, then do you have to invite this other person's sister? It's a slippery slope, my friends. The boundaries are limitless.

What about children? Is there a polite way of saying, "We don't want your sticky, monkeys of offspring terrorizing our wedding and spilling juice on the pretty bride's expensive dress?" Only directly related children will be permitted to attend.

So basically if you do not receive a Save the Date card by the end of March one of the following has occurred:
a) We were too lazy, and decided to forego sending STD cards (which will not happen).
b) You didn't make the cut, and will just have to live through photographs.
c) We really did forget to add you to our list, but hopefully we catch this mistake in time for when we send out the formal invitations.

If you really want a ticket to the show, you can promise not to eat a thing and opt for an Evite instead.

Hopefully none of this will matter in the end. At our wedding, I doubt I will worry about who we missed. It will all be one massive blur because I am sure that I will only be focused on my loving husband and the pure happiness that I will be so lucky to experience.